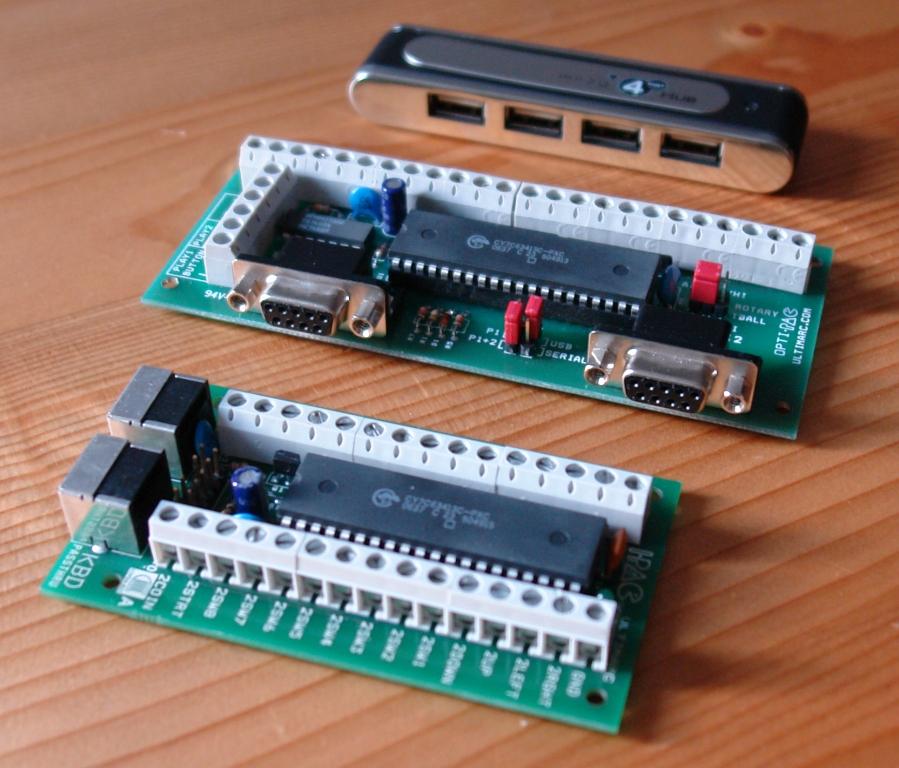
All the buttons, spinners and trackballs somehow have to be attached to the PC which runs MAME. This is accomplished by certain types of logic boards, which plug into an USB or PS/2 port and allow the abovementioned controls to be hooked on. MAME uses keyboard strokes and mouse signals as input, that's why these controllers simulate standard keyboards and mice. The advantage is that there is no need for additional drivers, because any operating system supports standard input devices out of the box. Here is a short description of the logic boards I selected and what I had to do in order to make them work within the tight space of the controller's housing.
In the Design section I already talked about which controls and how many of them I was going to install:
| Player Buttons: | 8 | |
| Coindoor Buttons: | 2 | |
| Start Buttons: | 2 | |
| Spinners: | 2 | |
| Trackballs: | 2 |
For this collection of controls, an I-PAC 2 (a keyboard) and an Opti-PAC (two mice) from Ultimarc seemed to be an obvious choice. Because I didn't want to have several cables sticking out of the controllers, I added an USB hub, too:
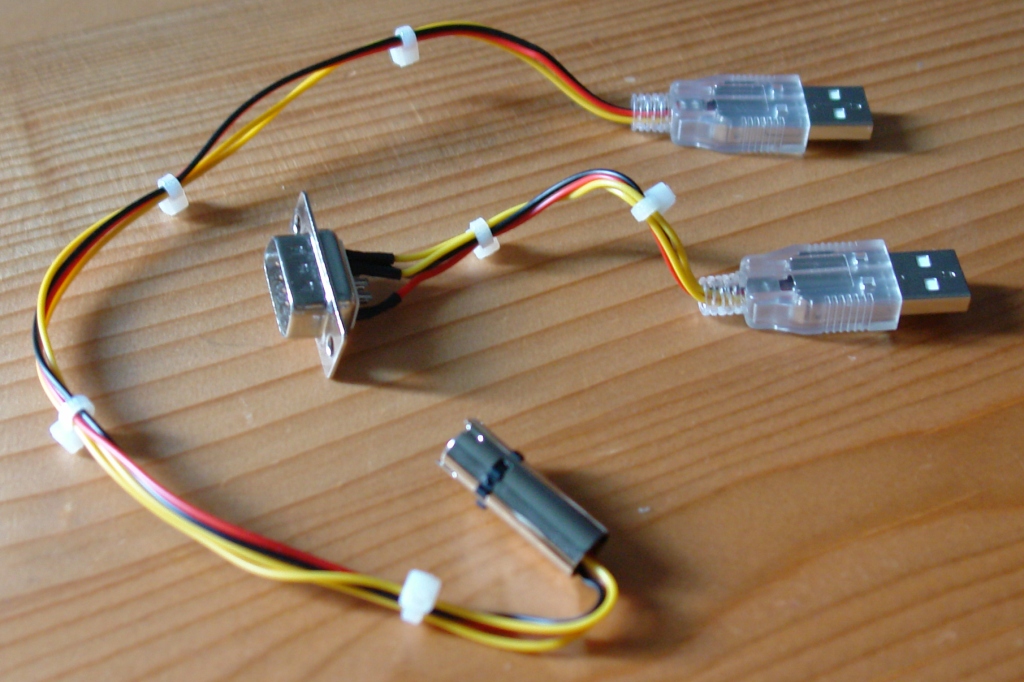
When I started to install these boards into the master controller, I encountered a problem with the USB cables which came along with them. They were much too long for the controller's narrow housing; especially the extremely elongated enclosure of the mini- din plug for the PS/2 jack of the I-PAC 2 collided with the spinner. I really don't understand why those PS/2 plugs are commonly very long sized. I bought an assembly kit (of cause, it was longish as well), which turned out to contain nothing but a tiny receptacle for the six pins with solder cups. However, after I dropped the outer plastic cover, the plug was short enough for me.
Fortunately, the USB cables for the I-PAC 2 and the Opti-PAC are simple pin- to- pin connections between the plugs at both ends, which makes the construction of customized versions very easy. First, I checked which pin was connected to which using a voltmeter. Here is the result:
| PS/2: | SUB-D(9): | USB: | ||
|---|---|---|---|---|

|

|

|
| I-PAC 2: | Opti-PAC: | |||||||||||||||||||||||||||||||||||||||||||||||||||
|---|---|---|---|---|---|---|---|---|---|---|---|---|---|---|---|---|---|---|---|---|---|---|---|---|---|---|---|---|---|---|---|---|---|---|---|---|---|---|---|---|---|---|---|---|---|---|---|---|---|---|---|---|
|
|
The above images of the plugs are views from their pin side. After being soldered onto the plugs, the four wires were thoroughly insulated against each other with heat shrink tube. The casings of the PS/2 and the SUB-D plug could be omitted that way, which made them fit in nicely. Finally, the customized cables looked like this: